Introduction
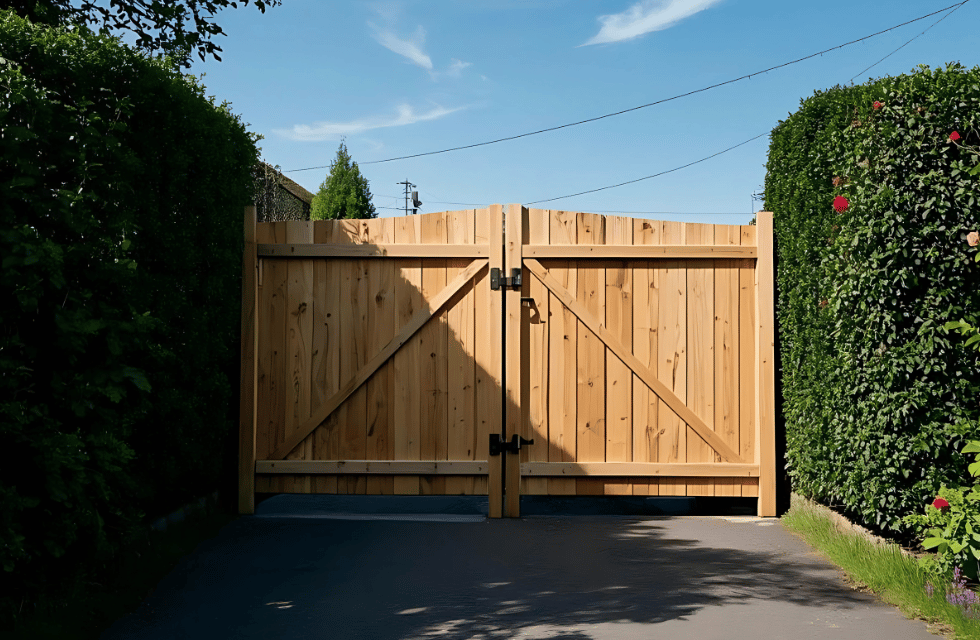
A well-designed wooden gate serves as a functional and aesthetic enhancement to any property, providing security, privacy, and visual appeal. Whether intended for a garden, driveway, or backyard, the longevity and performance of the gate depend on precise planning and meticulous execution.
In this comprehensive guide, we delve into the detailed process of constructing a structurally sound and visually appealing wooden gate, incorporating advanced techniques for durability and customization.
How to Build a Wooden Gate? A wooden gate is a practical and stylish addition to any yard, garden, or driveway, providing security, privacy, and curb appeal. Whether you’re replacing an old gate or building one from scratch, the process requires careful planning, the right materials, and basic carpentry skills.
By following the proper steps—measuring accurately, selecting durable wood, and assembling a sturdy frame—you can create a functional and visually appealing gate. In this guide, we’ll walk through the essential steps to help you build a strong and long-lasting wooden gate that complements your outdoor space.
| Step | Description |
|---|---|
| 1. Measure the Opening | Measure the width and height of the gate opening, leaving space for hinges and clearance. |
| 2. Choose the Right Wood | Use durable wood like cedar, redwood, or pressure-treated lumber to resist weather damage. |
| 3. Cut the Frame Pieces | Cut the top, bottom, and side pieces to size using a saw. |
| 4. Assemble the Frame | Secure the frame with screws or nails, ensuring it is square and sturdy. |
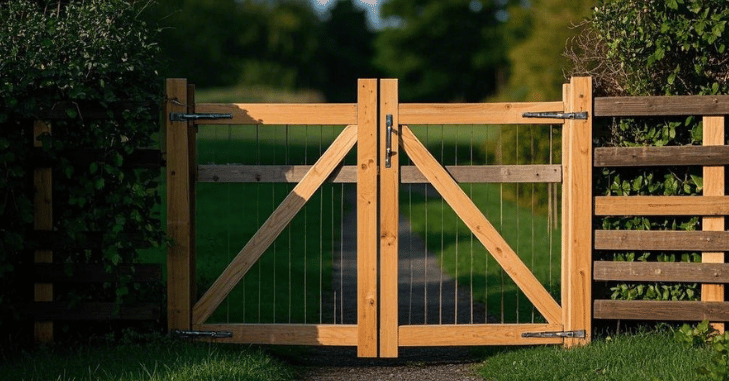
| 5. Add Bracing | Install a diagonal brace from the bottom hinge-side to the opposite top corner to prevent sagging. |
| 6. Attach Vertical or Horizontal Boards | Secure boards to the frame using screws or nails to create the gate’s main panel. |
| 7. Install Hinges | Attach strong hinges to the frame and then secure them to the fence post. |
| 8. Add a Latch or Lock | Install a latch or lock for security and easy operation. |
| 9. Finish the Gate | Paint, stain, or seal the wood to protect it from moisture and sun damage. |
| 10. Test and Adjust | Install a diagonal brace from the bottom hinge side to the opposite top corner to prevent sagging. |
Essential Structural Considerations for a Durable Wooden Gate
When building a wooden gate, understanding the structural fundamentals can make the difference between a sturdy entrance and one that sags or fails prematurely. A well-constructed gate begins with accurately measuring the opening and preparing strong, level posts that will support the weight of the gate and ensure smooth operation. Incorporating a diagonal brace or support between the horizontal rails and vertical stiles is crucial because it helps distribute the load and prevent the gate from sagging over time — especially in wider designs. Additionally, choosing exterior-grade hardware and ensuring proper spacing around the gate (so it doesn’t rub against the ground) will improve both functionality and longevity. Thoughtful attention to these core construction and installation details sets the foundation for a durable, attractive wooden gate.
How to Build a Wooden Gate?
Building a wooden gate requires careful planning, the right materials, and basic carpentry skills. Start by measuring the gate opening to determine the correct dimensions. Use pressure-treated lumber or cedar for durability and resistance to weather. Cut the frame pieces to size and assemble them using screws or nails, ensuring the frame is square for stability.
Add diagonal bracing for extra strength and attach vertical or horizontal boards for the gate’s surface. Secure sturdy hinges to one side of the gate and attach them to the fence post. Finally, install a latch or lock to keep the gate securely closed. For longevity, consider sealing or painting the wood to protect it from the elements.
Essential Materials and Tools
Materials:
Pressure-treated lumber or cedar (for longevity and resistance to decay and pests). Galvanized screws or nails (corrosion-resistant for prolonged outdoor exposure). Heavy-duty hinges (selected based on gate size and weight).
Gate latch or locking system (for security and accessibility). Wood glue (for reinforced joint stability). Exterior-grade wood stain, paint, or weatherproof sealant (for protection against environmental factors)
Concrete mix (for securing gate posts, where necessary). Gravel (for improved drainage and moisture prevention around posts). Decorative trim or molding (for enhanced visual appeal). Metal brackets or corner braces (for structural reinforcement).
Tools Required:
- Measuring tape (for precision in gate dimensions)
- Circular saw or handsaw (for accurate wood cutting)
- Power drill and screwdriver (for efficient assembly and fastener installation)
- Clamps (to hold components securely during construction)
- Level (to ensure vertical and horizontal alignment)
- Carpenter’s square (to maintain proper angles)
- Hammer (for securing nails or making minor adjustments)
- Post hole digger (for setting support posts)
- Paintbrush or sprayer (for smooth finishing application)
- Chisel (if custom hinge recessing is needed)
- Sandpaper or power sander (to smooth wood surfaces and edges)
- Protective equipment (safety goggles and gloves for personal safety)
Step-by-Step Construction Process
Step 1: Accurate Measurement and Site Preparation
Before beginning construction, carefully measure the width and height of the designated gate opening. Account for hinge clearance, latch positioning, and potential wood expansion due to moisture fluctuations. Leaving approximately ½ inch of clearance on both sides ensures optimal gate movement without obstruction.
Determine the height of the gate based on privacy requirements, security needs, and aesthetic considerations. Standard heights range from 3 to 6 feet, though taller gates may be preferable for enhanced privacy and security.
Step 2: Precision Cutting of the Gate Frame
Using the measured dimensions, cut the necessary frame components:
- Vertical stiles (side supports)
- Top and bottom horizontal rails (providing structural integrity)
- Middle rail (to minimize warping and enhance strength)
For additional reinforcement, incorporate a diagonal brace in a Z-pattern or an X-brace design to counteract the gravitational force acting on the gate. The diagonal brace should extend from the bottom hinge side to the upper opposite corner to provide optimal load distribution.
Step 3: Assembling the Gate Framework
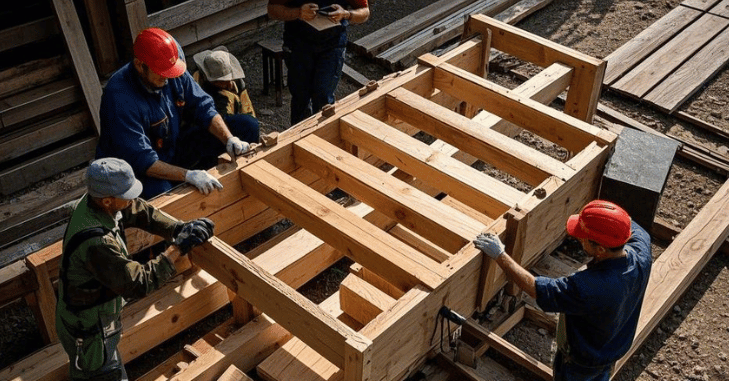
Lay the cut frame components on a flat, level surface. Ensure that the frame is square using a carpenter’s square. Secure the frame with wood glue for added bond strength, followed by screws to fasten the joints securely. If using a diagonal brace, attach it at an angle, ensuring proper force distribution. Reinforce all critical joints with metal brackets or corner braces to enhance structural rigidity.
Step 4: Attaching Pickets or Paneling
To construct a solid wooden gate, fasten vertical pickets or solid panels onto the frame. Space them evenly or arrange them closely for increased privacy. Secure each picket with screws or nails, ensuring uniform alignment.
For decorative customization, consider adding latticework, curved top panels, or custom-cut design elements. Pre-cut trim molding can also elevate the gate’s aesthetic appeal.
Step 5: Sanding and Protective Finishing
To ensure a polished final product, the gate thoroughly eliminates rough edges. A power sander expedites this process. Once smooth, apply a high-quality weather-resistant stain or paint to shield the wood from:
- UV radiation (preventing fading and cracking)
- Moisture exposure (reducing the risk of warping and rot)
- Pest infestations (especially for untreated wood varieties)
- A final sealant application further enhances durability, preserving the gate’s integrity over time.
Step 6: Installation of Support Posts (If Required)
If support posts are absent, install them using the following steps. Dig post holes 24–30 inches deep, ensuring they extend below the frost line for stability. Pour a layer of gravel at the bottom of the holes to aid drainage and prevent wood rot.
Set the posts in concrete, verifying their alignment using a level. Allow the concrete to cure for at least 24–48 hours before proceeding with gate installation. For heavier gates, use reinforced wooden posts or steel posts for increased load-bearing capacity and long-term resilience.
Step 7: Hinge Attachment and Alignment
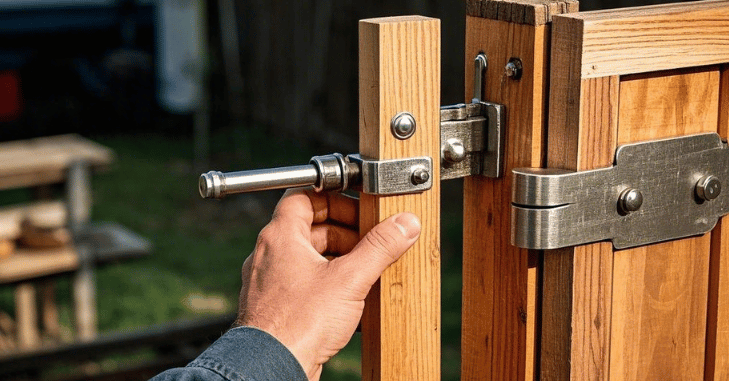
Position the gate in place, using wooden blocks or a temporary brace to maintain proper elevation. Attach hinges to the gate’s frame and then secure them to the support post with heavy-duty screws.
Test the swing functionality, ensuring smooth operation without dragging or misalignment. Adjust hinges as necessary to maintain a balanced movement. If using self-closing hinges, calibrate the tension appropriately to avoid excessive slamming.
Step 8: Latch and Lock Installation
Align the latch mechanism at a convenient height for accessibility. Secure the latch to the gate, ensuring it properly engages with the receiver on the post. If a locking mechanism is required, install it in alignment with the latch for seamless functionality. For double gates, consider adding a drop rod to secure one side while the other remains functional.
Step 9: Final Adjustments and Testing
Verify that the gate swings freely without obstruction. Tighten any loose screws or fasteners. Ensure proper alignment and make any necessary positional corrections. Conduct a final inspection and apply additional paint or stain touch-ups where required. Confirm that the latch and lock mechanism operate efficiently.
Advanced Customization Enhancements
- Decorative Metalwork: Integrate wrought iron or ornamental metal elements for a high-end appearance.
- Automated Gate Opener: For large gates, install an electric opener for added convenience.
- Curved or Arched Design: Introduce a gracefully arched top instead of a conventional flat layout.
- Integrated Trellis Feature: Incorporate a lattice or trellis extension for a unique aesthetic effect.
Maintenance and Longevity Strategies
Tighten screws and hinges as needed to maintain stability. Re-stain or repaint every 2–3 years to prevent weathering. Use a rust-resistant lubricant to ensure seamless hinge movement. If sagging occurs, install a tension cable kit to rectify misalignment. Regularly assess post integrity, particularly after adverse weather conditions.
By adhering to these advanced construction techniques and maintenance strategies, you can ensure that your wooden gate remains a long-lasting, visually appealing, and functional addition to your property. With proper care and craftsmanship, a well-built wooden gate will serve its purpose for decades to come.
Conclusion
Building a wooden gate is a rewarding DIY project that enhances both the functionality and aesthetics of your outdoor space. By carefully measuring, using quality materials, and reinforcing the structure with proper bracing, you can create a sturdy and long-lasting gate. Secure installation of hinges and a latch ensures smooth operation and security. To maintain its durability, consider sealing, staining, or painting the wood to protect it from weather damage. With patience and attention to detail, you can craft a well-built wooden gate that serves its purpose effectively for years to come.
Apart from that if you want to know about “A Comprehensive Guide to Kitchen Cabinet Painting: How to Paint, Cost, Design Ideas, Maintenance & Care and More” then please visit our “Home Improvement” Category.
FAQs
Standard garden gates are typically 3 to 4 feet wide, while driveway gates can range from 10 to 16 feet wide. However, the size depends on your specific needs.
Yes, applying a protective finish like paint, stain, or wood sealer helps prevent moisture damage, warping, and fading over time.
Use strong hinges and mount them securely to a sturdy fence post. Ensure the gate is level and allows clearance for smooth opening and closing.
To prevent sagging, a wooden gate should include a properly installed diagonal brace, strong corner joints, and sturdy hinges. Ensuring the gate posts are level and firmly set in the ground is also essential.
The best wood for a wooden gate is typically pressure-treated lumber or naturally weather-resistant wood such as cedar or redwood. These materials are durable, resist rot and insects, and perform well outdoors.